
WIP WednesdayWIP WednesdayWIP WednesdayNovember 9, 2022November 9, 2022November 9, 2022

This post is also available on my Patreon. Join up and get pixel art for your game!
Hey everyone, I’m here for a Work-In-Progress Wednesday to show off what I’ve been working on!
Today I’d like to share a little bit from behind the scenes about my workflow. You’ve all seen how I draw pixel art thanks to the time lapse videos, but what about the other things that make it all possible?
Sprite Demo Maker
One of my most recent new tools, the Sprite Demo Maker has already been instrumental in helping me speed up the process of video editing. A sprite demo is simple: It’s typically a looped animation of a particular sprite (usually a character with multiple animations) on top of a background. Or maybe I should say… it sounds simple.
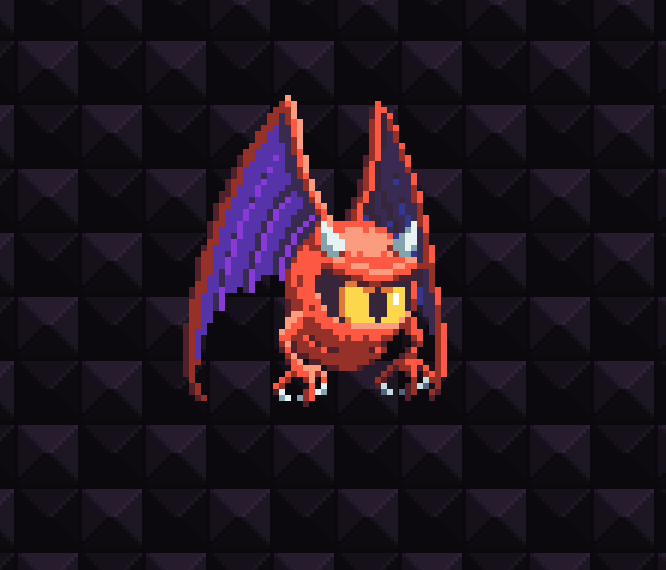
The demo above for the flying demon sprite has two animations: the idle animation, and an attack animation. My old workflow for making demos like the one above was to open the animations in Photoshop, align them the way I want on the background, then copy/paste them in the desired order until I got to the demo length I wanted. The sprite demos would then be exported to PNG sequences, which I could import into Videopad for video editing. This process was pretty time-consuming overall, especially for characters with lots of animations.

The Sprite Demo Maker (SDM) is almost the entirety of my new workflow, and it produces demos like the Space Fly above. Like the flying demon demo, this one also has multiple animations. The SDM works by first processing a hand-crafted metadata file, which is just a plain text file like below.

The animations are defined on the anim_id line in the order I want. The duration controls how long the final demo will be, and a duration of 0 means “as long as the input animations.” It’s pretty easy to make the metadata files, I can just copy old ones and change the spritesheet path and the animation settings.
The SDM then takes the info from the metadata and generates both a PNG sequence and a GIF. The PNG sequence can be used in my videos just like the old workflow. The GIF output is new, and makes posting sprite demos on Twitter or Reddit a snap! Plus, I needed to work with the GIF format eventually for SparkBolt Studio, so this was a very good opportunity to learn. I’m really proud of my fast multithreaded approach to processing the GIF frames!
Aside from the workflow improvement, it also allows me to improve the style of the output a bit. I can control whether or not I want a watermark on it. The background is tailored to the output size and customized to be the color I want. There’s a drop shadow under the sprite to make it stand out more. Finally, there’s a title that can optionally be displayed above the sprite.
Overall, the Sprite Demo Maker is a great improvement and I can’t wait to put it to use more! One of the things on my wishlist is to be able to do two or more sprites at once, which would be useful for assets that have multiple sizes that I want to show off.
That’s all for today. I’m looking forward to sharing more about my workflow tools in a future WIP Wednesday!
Until then, I’ll see you with a new asset pack on Friday and another Pixel Quickie on Sunday!
– Will